.jpg?height=120&name=LendingPad_nobigdot_ver2%20(6).jpg)
-
Login to LendingPad as System Administrator

- Click on “Settings”
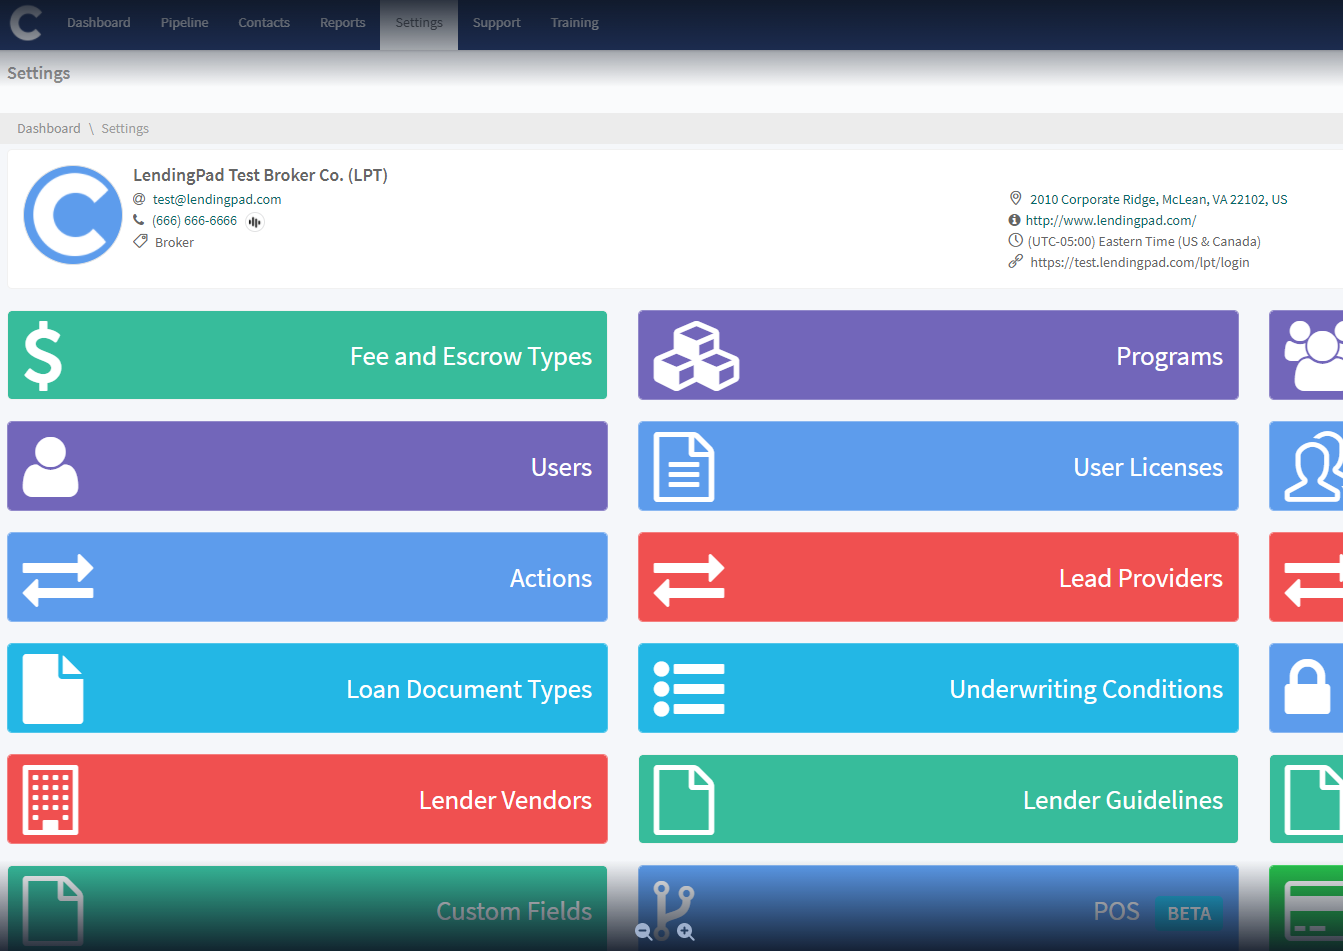
- Click on “Custom Fields”

- Click on “Add New Custom Field” button

- Input the Label Name and Select Parameter Type, Type, Formatting Type

- Click on “Save Changes”

- Under General Information section, You can add a default value (It will be applicable to all loans) and define the sections for “Custom Field”

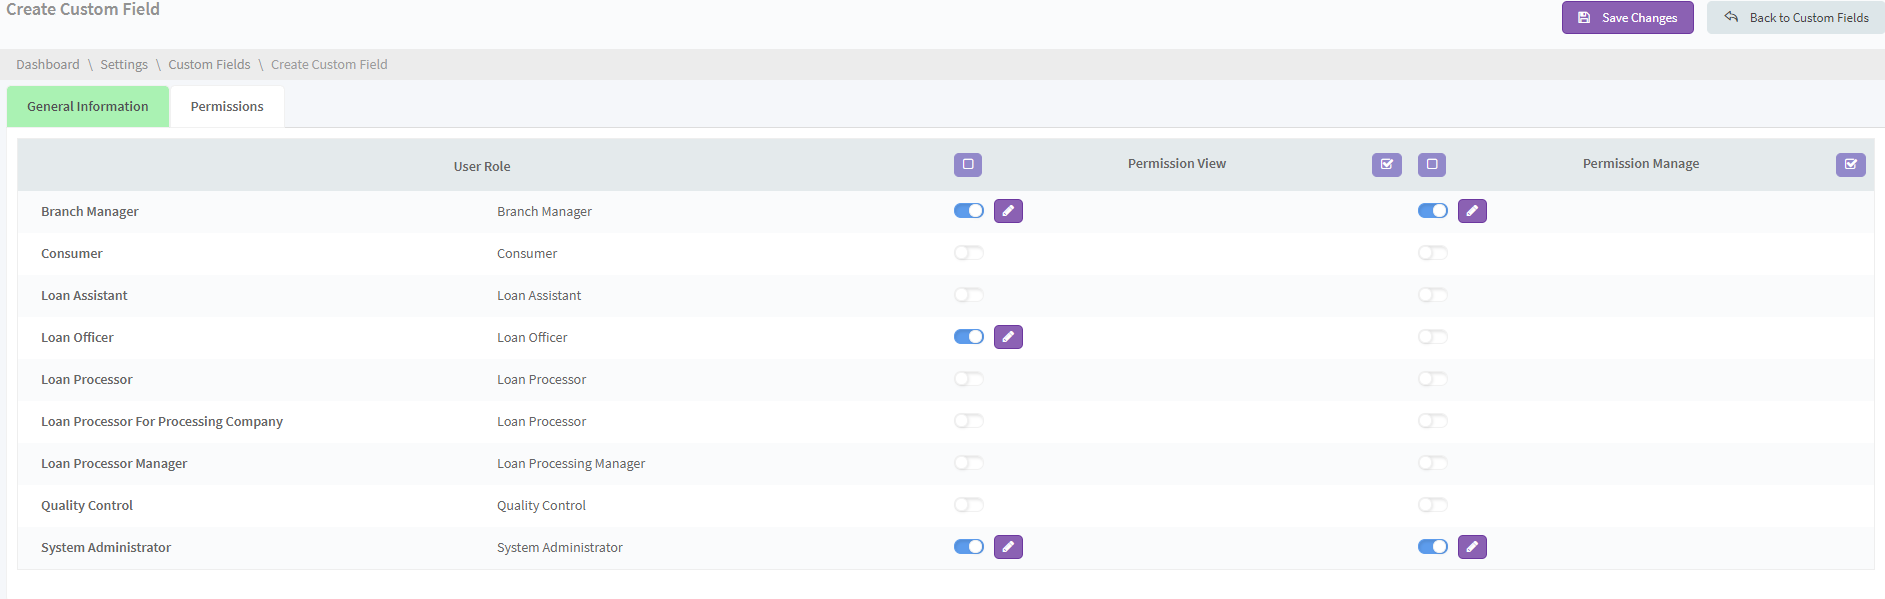
- Click on “Permissions” tab to define View/Manage permissions for “Custom Field” and click on “Save Changes”
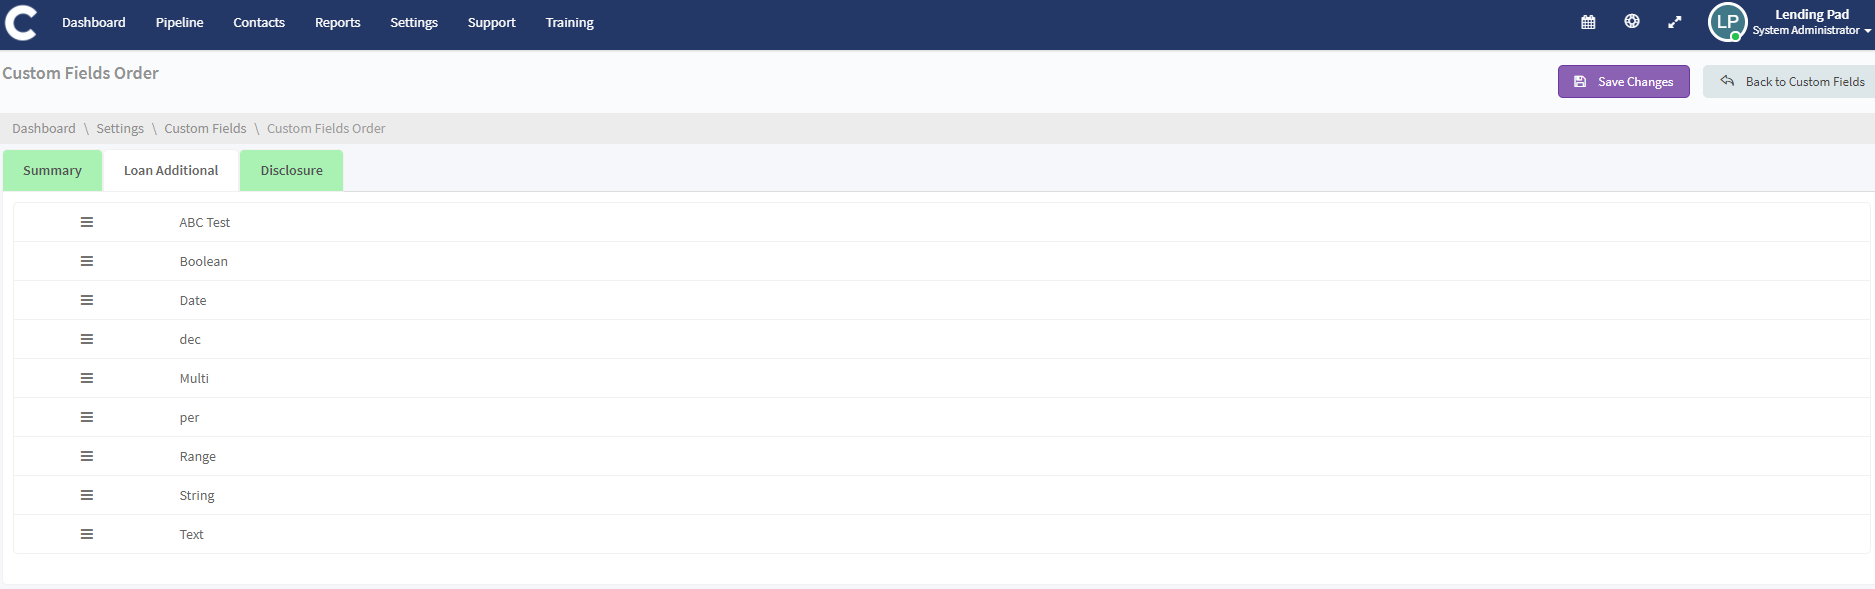
- Click on “Change Custom Fields Order” button to rearrange

- Drag the fields to change the order and click on “Save Changes”