.jpg?height=120&name=LendingPad_nobigdot_ver2%20(6).jpg)
The Reports screen provides you with a variety of built-in reports that allow you to analyze various data or request lists of loans that meet certain criteria.
For example, you can request a report that displays loan details by status or a report that displays all funded loans. These reports can help you quickly determine the progress of loans throughout the loan process and help you manage exceptions and outliers.
This screen can also be used by system administrators to set permissions for the roles that can view certain reports as well as Dashboard modules.
To access the Reports screen, click the Reports menu item at the top of the application.
To view a report, click the  (View Report) icon. A new screen displays based on the selected report. For example, the Life Of Days Report screen displays when the (View Report) icon is clicked for the Life Of Days report. Enter criteria in the Search Criteria section, and then click the Search button to display report results.
Reports can be exported to .xlsx files by clicking the Export Report button at the top of the report screen. A message displays, indicating that a request has been made to export the report. To view the export, access the Reports screen by clicking the Back to Reports button, and then click the Export Report Requests button. A separate screen displays, where reports that have been requested to export are listed. To download the report, click the Expand icon for the corresponding item. Then click the Download link. The report downloads to your local computer as an .xml file, allowing you to easily save or share the report information.
-
Click the Summary Reports Permissions button to view or edit permissions for Dashboard modules using the Loan Summary Reports Permissions screen. To edit permissions for a module, click the corresponding
 (Manage Report Permissions) icon. On the Permissions screen that displays, the list of user roles displays on the left in the User Role column, and the permission indicator displays on the right in the View Report column.
 -
If a role has permission to view a module, the permission indicator displays blue and to the right. If a role does not have permission to view a module, the permission indicator displays white and to the left. To change a permission, simply click the permission indicator.
Alternatively, you can click the
 (Deselect All) icon to remove permission to view a module from all roles. Click the
  (Select All) icon to grant permission to view a module to all roles.
Once you have finished making changes, click the Save Changes button at the top of the Permissions screen.
-
Click the Permissions button to view or edit permissions for reports using the Reports Permissions screen. To edit permissions for a report, click the corresponding
(Manage Report Permissions) icon. On the Permissions screen that displays, the list of user roles displays on the left in the User Role column, and the permission indicator displays on the right in the View Report column.If a role has permission to view a report, the permission indicator displays blue and to the right. If a role does not have permission to view a report, the permission indicator displays white and to the left. To change a permission, simply click the permission indicator.
Alternatively, you can click the
(Deselect All) icon to remove permission to view a report from all roles. Click the (Select All) icon to grant permission to view a report to all roles.Once you have finished making changes, click the Save Changes button at the top of the Permissions screen.
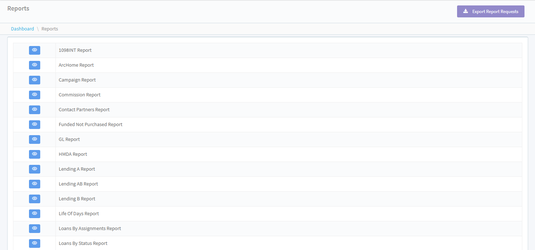
Available Reports
The following reports are available on the Reports screen.
-
1098 INT Report. This report displays the interest paid for all loans funded for a selected year.
-
Campaign Report. This report displays information for loans associated with specific campaigns. In addition, reports can be displayed based on a specific date range or time period.
- Closing Report. This report displays all the loans that have closing dates in the selected date period.
-
Commission Report. This report displays all closed loans, including compensation information, within a certain date range or time period.
-
Contact Partners Report. This report displays a list of all orders, such as appraisal requests or fraud reports, placed to third-party vendors.
-
Funded Not Purchased Report. This report displays all loans that have a Funding date, but do not have a Purchased date.
-
GL Report. This report displays the differences between buying prices and selling prices for all loans within a specific date range or time period.
-
HMDA Report. This report displays details for loans with HDMA-related information, such as agency codes, census tract details, and HOEPA statuses. Loans can be displayed based on a specific date range or time period, as well as by associated state.
-
Lending A Report. This report displays all loans closed within a specific date range or time period.
-
Lending AB Report. This report displays loans with a Purchased date within a specific date range or time period. In addition, details about transfer data discrepancies in principle and escrow balances display on the report.
-
Lending B Report. This report displays all loans funded within a specific date range or time period.
-
Life Of Loans Report. This report can display one of the following options for inactive loan records: loans that were modified more than a certain number of days ago, loans with Application Taken dates more than a certain number of days ago, or loans ECOA more than a certain number of days ago.
-
Loans By Assignments Report. This report displays details for loans by role, employee, and loan status.
-
Loans By Status Report. This report displays details for loans by status, campaign, and business channel.
-
Lock Expiration Report. This report displays loans with upcoming or past Lock Expiration dates. For example, you can display loans that expired within the past five days or loans that will expire within the next ten days. Loans can also be displayed by status, campaign, and business channel.
-
Lock Fallout Report. This report displays loans for which the Funding date is not on or before the Lock Expiration date.
-
NLMS Report. This report displays loan information required for NMLS reporting, such as the loan amounts received from borrowers and the loan amounts received from third parties.
-
QC Report. This report displays information for closed loans as well as information required for QC samplings, such as loan LTVs and loan rates.
-
Secondary Hedge Report. This report displays all active loans with programs that are hedged.
-
Underwriting Report. This report displays loans by underwriting status, campaign, and business channel.
Manage Report
You have the option to create a custom report. Click on Create New Report, select "Company" or "Personal", and define the filters and fields you would like to view from this section.
A template option is available to present data in pivot tables. When designing the template, be sure to have a tab called "Report Data", and the first row must match the report headings you designed from the Fields section. Use a separate worksheet to design your pivot tables.
When you finish, upload it, and run a custom report. Pick up the report spreadsheet, go to the Data tab to refresh. This report can also be configured to be emailed to users on a schedule in Export Report, Manage Report Export Settings area.
Some reports may take a while to run to be displayed on UI. This is due to the quantity of data requested or its filter selection criteria. We suggest you adjust filter criteria or use the Export Report Settings feature to schedule large reports to run on a schedule before the report is needed.
The maximum amount of fields allowed per report is 50 and records queried is 2000. Should the results need to return more fields/records, please design multiple custom reports and link them with loan numbers.